Give your WordPress site its first task.
Connect the site you already have, add your agent to Slack or Telegram, and tell it what you need.
Connect your siteStart with 500 free credits. No credit card needed.
Optimizing pictures in WordPress is three jobs, not one setting: size each image for where it displays, serve a compressed modern version the browser actually receives, and load the hero image first. Most failures happen between the settings screen and the live page, so check the rendered page, not the plugin’s report.
The median WordPress page loads about 725 KB of images on mobile, according to the HTTP Archive’s 2024 Web Almanac. On 68% of mobile pages, the largest thing a visitor sees first is an image. So when a page feels slow, pictures are the first place to look. They are rarely the only cause.
Optimizing pictures comes down to three jobs. Upload images sized and compressed for where they display. Serve responsive and modern-format versions that the browser actually receives. Don’t delay the image people see first. Do them in that order, because each one depends on the one before it. And if images turn out not to be the bottleneck, remember that a slow WordPress site usually has more than one cause.
You need an administrator login, permission to install a plugin, and a browser with developer tools (Chrome or Firefox). If you have to change server rules for WebP delivery, you also need your host’s control panel or their support team. Take a backup first. Any bulk operation that rewrites files should be undoable.
Next, measure two things for the page you care about. Find the width the theme actually renders each image at: right-click the image, choose Inspect, and hover the <img> element to see its displayed size. Then open the image’s details in the Media Library and check the uploaded dimensions and file size. If an image displays at 700 px wide and the upload is 4,000 px, you have found the biggest win before touching any plugin.
Sizing matters more than anything else. A phone photo uploaded straight to the Media Library is often several megabytes and thousands of pixels wide. Compression shrinks the bytes, but the pixels are still there. WordPress still has to process that original and build every thumbnail size from it.
Aim for the largest width the image ever renders, or about twice that if you want sharp results on high-density screens. Practitioners on Reddit describe taking a 3 MB, 2,500 px product photo down to about 800 px and roughly 100 KB with no visible loss. For a full-width hero, around 2,000 px is a common ceiling.
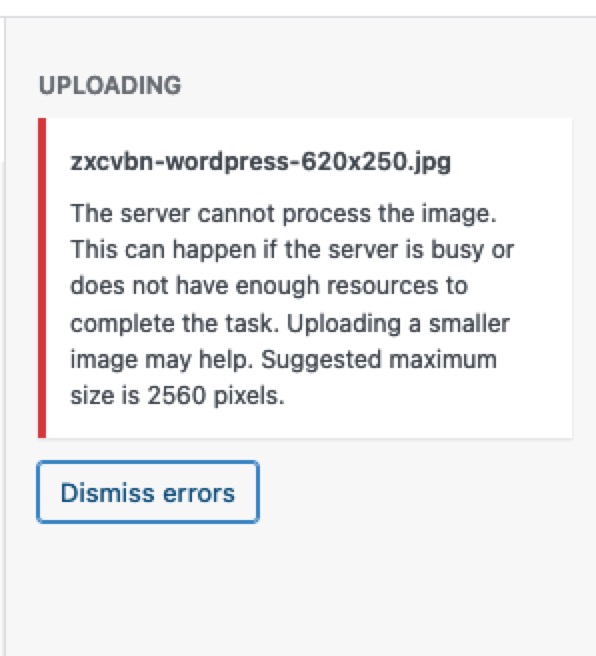
You will see 2,560 px mentioned a lot. That isn’t a recommendation. It’s the point where WordPress creates a “-scaled” copy of a large upload, and it’s the “suggested maximum” in WordPress’s upload error. Treat it as the point where WordPress starts scaling uploads down, not as a size to aim for.
You can resize before upload with a desktop editor or a free browser tool such as Squoosh. You can also use a plugin that caps uploads at a maximum width and can resize images already in the library. If staff or clients upload directly, a cap is more reliable than training.
The WordPress.org documentation on image size and quality treats quality and file size as a tradeoff, and it is one. Lossy compression saves the most and can cost detail. Lossless compression keeps every pixel and saves less. Photos usually take lossy compression well. Screenshots with text, logos and product close-ups often don’t.
WordPress.org support forums have threads about images coming out blurry or with dull, muted colours after compression. The usual fix is to lower the compression level and keep the originals so you can reprocess. Before you run a whole library, compress a handful of representative images and look at them at full size. Check a face, a fabric texture, a gradient and a logo.
Since version 4.4, WordPress adds srcset and sizes attributes to the image markup it generates. srcset lists the available widths. sizes tells the browser how wide the image will display, so a phone downloads a phone-sized file. WordPress’s Responsive Images handbook notes that core does not add or change these attributes if the markup already has them.
The risk is custom markup. A theme, a builder module or a hand-written <img> tag can leave them out. If mobile visitors are downloading desktop-sized files, inspect the rendered HTML and check whether those attributes are there.
This is where most image work quietly fails. Converting a JPEG to WebP creates a second file. Serving it means the page, or the server, has to hand that file to the browser instead of the original. Imagify’s documentation treats these as two separate steps, and so should you.
Plugins usually offer two delivery methods. The <picture> method rewrites your HTML, replacing <img> with <picture>. Imagify warns that some themes and plugins aren’t fully compatible with it. The rewrite-rules method changes server configuration and leaves the HTML alone. Imagify recommends rewrite rules unless the site uses a CDN or Cloudflare.
Your host decides which of these can work. WP Engine’s support documentation says .htaccess methods don’t work on its platform. It uses Cloudflare Polish through its edge network, or an NGINX rule from its support team. Copy Apache instructions onto a host like that and nothing errors. Nothing changes either. Read your host’s WebP page before adding any rules.
Some images can’t be swapped at all by a normal plugin. In one WordPress.org thread, a site using The7 theme had AVIF files generated for the whole homepage, yet only one image loaded as AVIF while the rest stayed JPEG. ShortPixel support explained that CSS background images, images loaded by JavaScript, page builders and a second lazy-load system can each block normal delivery.
Use one image optimizer. Two optimizers, or an optimizer plus a host or CDN feature doing the same job, will fight over rewrites and give you false failures. Adoption is still low anyway: the 2024 Web Almanac counted WebP at 12% and AVIF at 1% of mobile image requests. WebP is the safer default. AVIF makes smaller files but takes more server effort to encode, and your server’s image library has to support it.
Google’s Search Central guidance says not to lazy-load content that is likely to be visible right away. The hero image is exactly that content. Lazy-loading it makes the browser find it late, which delays Largest Contentful Paint. Your PageSpeed score can still go up while the page gets slower for real visitors.
WordPress core treats loading="lazy" and fetchpriority="high" as conflicting values. Since WordPress 6.3, core tries to identify the likely LCP image itself and give it priority. WordPress.org reported that this made pages with a hero image load up to 21% faster. Theme and plugin markup can still override it, so check. A correctly loaded hero looks like this:
<img src="/wp-content/uploads/hero-1600x900.webp"
     width="1600" height="900"
     fetchpriority="high"
     alt="Bakery counter with fresh loaves">
There is no loading="lazy", and the width and height are explicit so the browser reserves the space and the layout doesn’t jump. Everything below the fold, such as later gallery items, related-post thumbnails and footer logos, should keep lazy loading. Run one lazy-load system only.
Settings screens report what a plugin did. Only the live page shows what a visitor gets. Clear the plugin cache, the server cache, the CDN cache and your browser cache. Then open the page in a private window and look at the Network panel with the Img filter on.
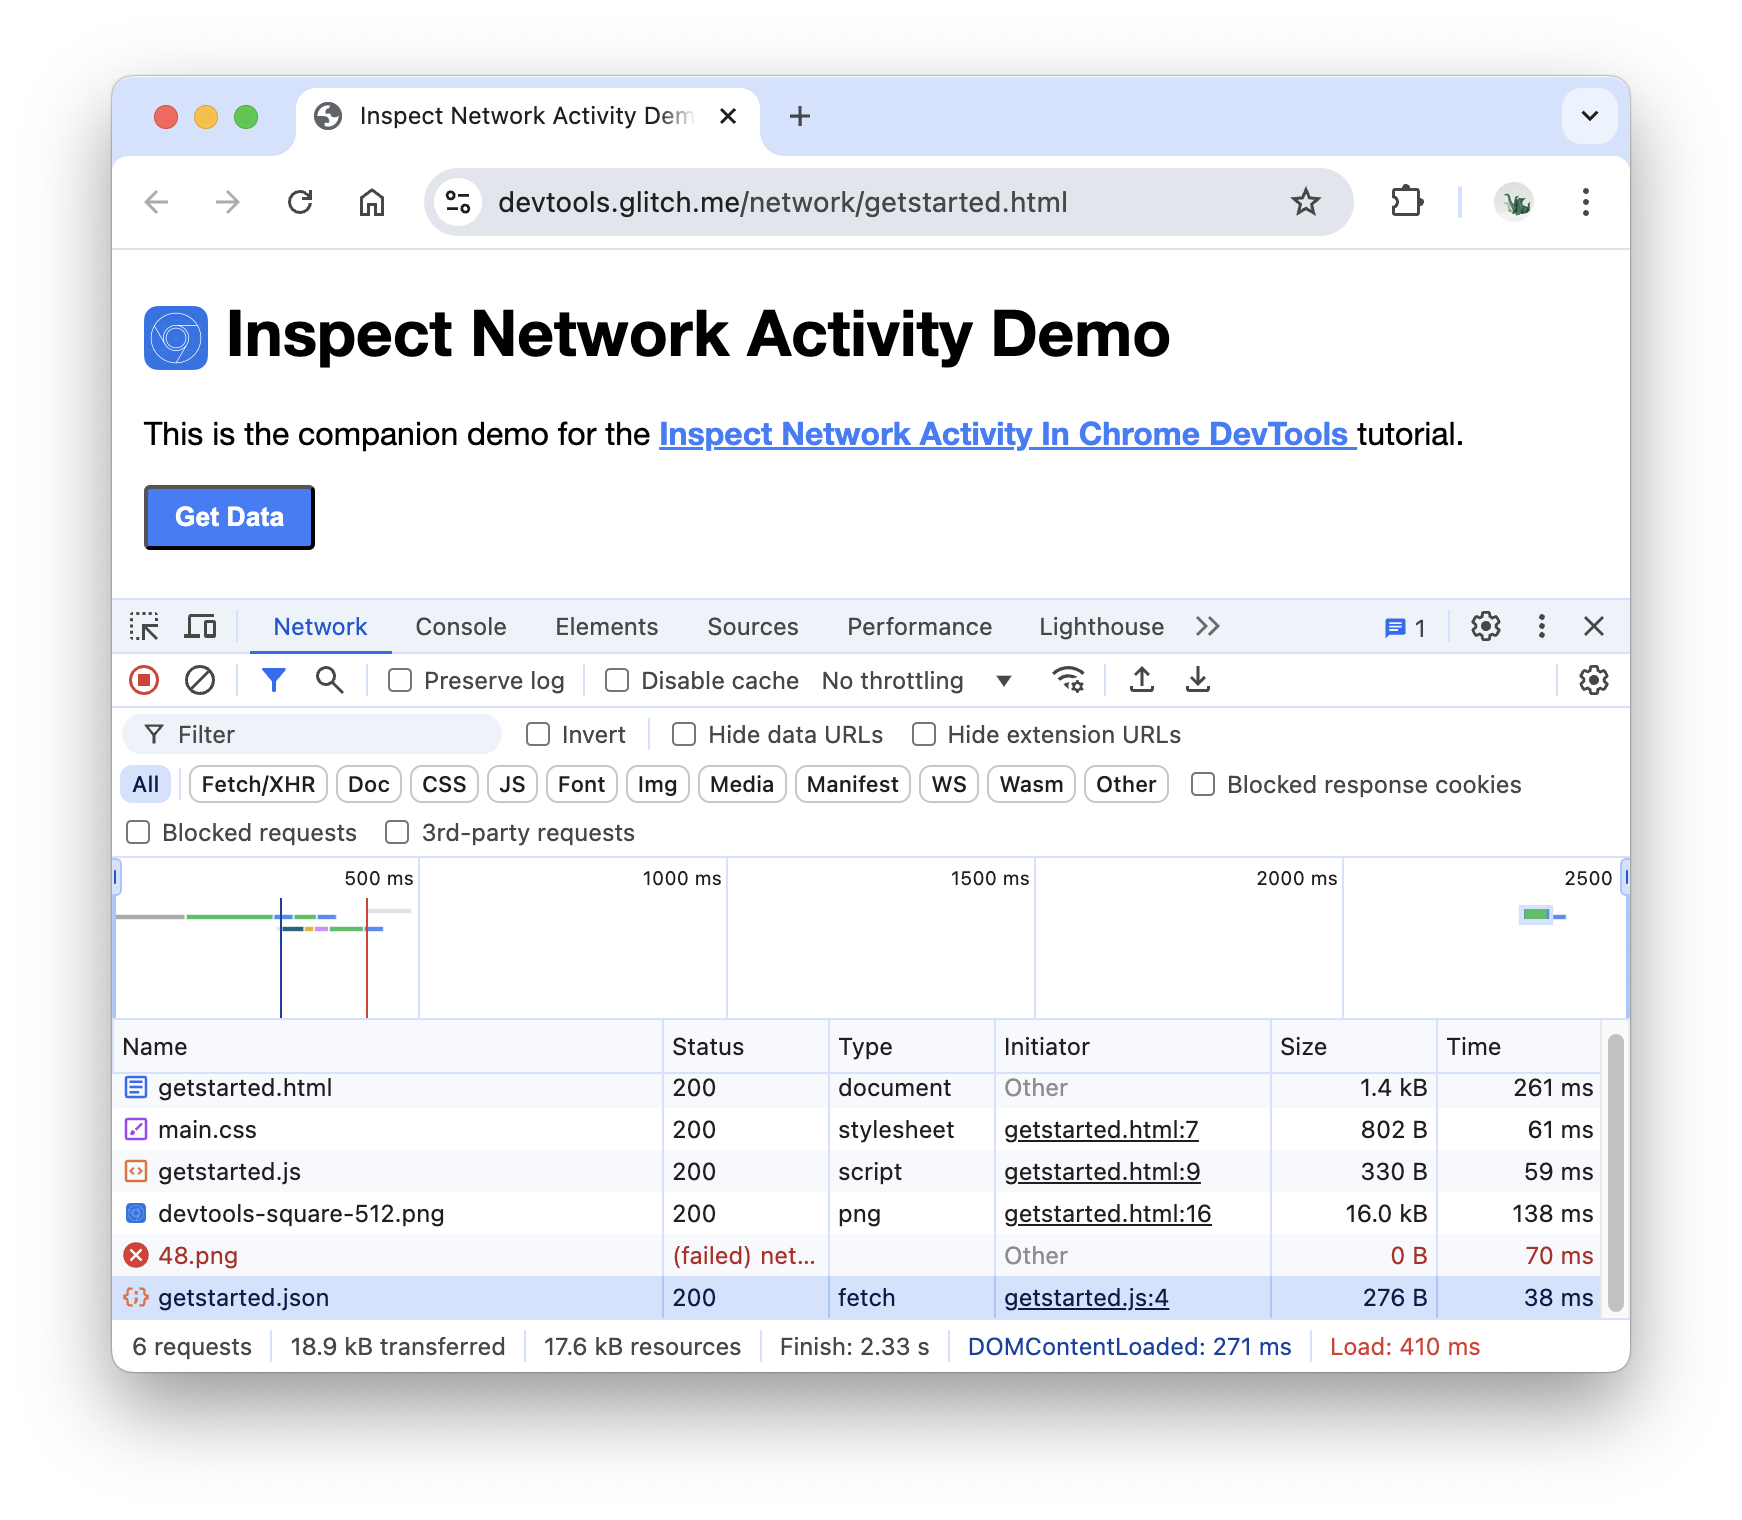
In the Network panel, the Type column shows webp or avif for your content images. Transferred sizes are in the tens or low hundreds of kilobytes, not megabytes. On a phone-width viewport, the file the browser picked is close to the displayed width. In the Elements panel, the hero image has no loading="lazy" attribute. And at full size, the images still look like the photos you took.
If the page is still slow after all of that, images were not the bottleneck. Look at scripts, the theme, caching and hosting next.
Go through the causes in order. Is the image a CSS background? Is a page builder outputting its own markup? Is a second plugin also lazy-loading or rewriting images? Is your host one that ignores .htaccess? Is a CDN serving a cached copy? Fix one cause, clear caches, and check the Network panel again.
Imagify’s troubleshooting steps work as a general test. Turn off the next-gen display setting, then clear the plugin, browser and CDN caches. If the images come back, delivery caused the problem. Switch methods on purpose: rewrite rules when there is no CDN or Cloudflare, <picture> when there is.
Running it again rarely helps, because the cause is usually the server. In one ShortPixel review on WordPress.org, a bulk run took more than 36 hours and ended with 197 errors. The causes were a CloudLinux memory limit killing PHP processes and a firewall that needed the service’s IP addresses allowed. Once the host raised the limit, the run finished. The site owner still saw little speed gain, which is a reminder to measure before assuming images are the problem.
Check the PHP memory limit, whether Imagick or GD is installed, and whether the uploads folder is writable. Then ask your host to read the error logs. Credit-based services often count every generated thumbnail size, not just the original, so exclude sizes your theme never uses before you start a large run.
WordPress shows this message, which ends with “Suggested maximum size is 2560 pixels”, when the server runs out of resources while processing an upload. Resize the file and try again, then fix the underlying limit. Our article on image upload and Imagick errors covers the server side.
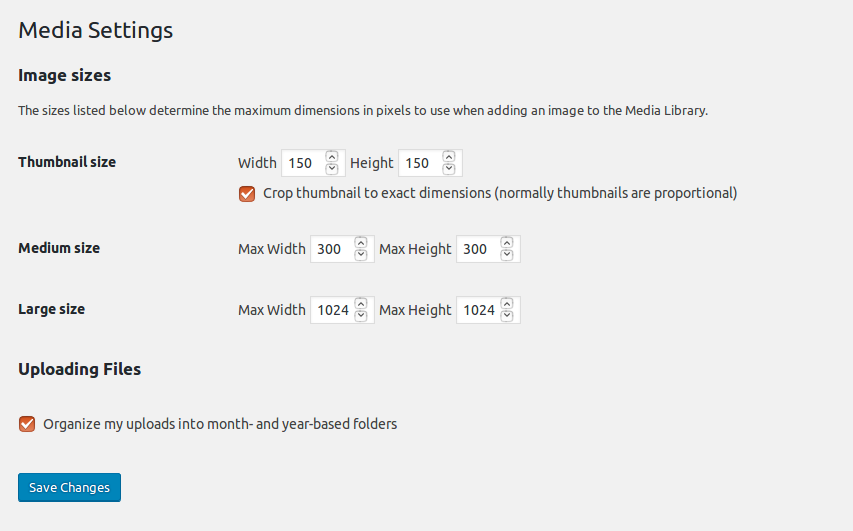
WooCommerce’s documentation says blurry product images usually come from theme styling that asks for dimensions your uploaded images don’t match. It recommends source images of at least 800 x 800 px for most themes, and image width settings that match or exceed what the theme renders. Regenerate thumbnails whenever you change those settings, switch themes or replace images. Without that, WordPress keeps serving the old sizes.
Two caveats. Enlarging a small photo won’t bring back detail. And doubling thumbnail dimensions for high-density screens makes them sharper but heavier. Shop and archive pages show smaller versions on purpose, so judge sharpness on the single product page.
Compression makes images faster. Alt text makes them understandable to screen readers and to search engines. The W3C’s images tutorial says alt text should reflect what the image is for: describe informative images, describe the action for linked or button images, and use alt="" only for purely decorative ones. Google’s image guidance says it finds images in the src of an <img> element and doesn’t index CSS background images. A product photo set as a background is invisible to image search. The same rules apply in galleries, as our guide to adding a WordPress gallery lightbox explains.
Stop when the fix needs server changes you can’t make: NGINX rules, memory limits, missing image libraries or firewall allowlists. Your host’s support team can do those, and doing them by guesswork can take the site down. If you would rather not do the work yourself, SiteSelf handles image and speed fixes on request. It needs hosting (SSH) access for file and server work, and it reports what it changed and what it checked on the live page.
No single number fits every site. Use the largest width the theme displays the image at, or about twice that for high-density screens. For WooCommerce, use at least 800 x 800 px. The 2,560 px figure is where WordPress starts scaling uploads down, not a target.
No. A small site that resizes and compresses every image before upload can do without one. A plugin earns its place when many people upload, when you have an existing library to process, or when you want WebP delivery handled for you. Use one, not several.
Start with WebP. It works in modern browsers and is easier on the server. AVIF can make smaller files, but encoding it takes more server effort and your server’s image library has to support it, so test it on your host before converting a whole library.
Only if the originals still exist. Most optimizers have a setting to keep a backup of each original. Turn it on before a bulk run. It uses extra storage, but you can restore or reprocess without hunting for source files.
Not always. Images already placed in posts often keep the alt text they had when they were inserted. Check the image block in each post where accuracy matters.
How-to Tutorials
Installing a WordPress theme takes minutes if you have the right file and a host that allows the upload. Most failures come from uploading the wrong ZIP or from a server limit, and the exact error message tells you which one. The real work comes after activation, when menus, widgets, demo content and checkout all need checking.
Read article ›How-to Tutorials
Good coming soon text says what is launching, who it is for and what to do now. On WordPress the harder part is often finding who owns the message: WooCommerce, a plugin, your host, a stuck update or a cache can each show it. Before you edit or remove it, work out which one is showing it.
Read article ›How-to Tutorials
The most reliable place to find your WordPress version is Tools → Site Health → Info → WordPress, because it reports what is actually installed. If you can’t log in, read $wp_version in wp-includes/version.php or run wp core version. Public clues like the generator tag, readme.html and ?ver= strings are only hints, and they are often missing or wrong.
Read article ›Connect the site you already have, add your agent to Slack or Telegram, and tell it what you need.
Connect your siteStart with 500 free credits. No credit card needed.